This post may contain affiliate links.
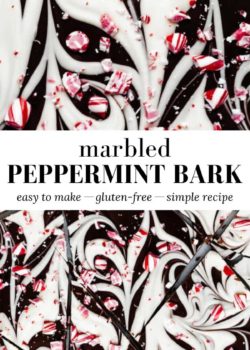
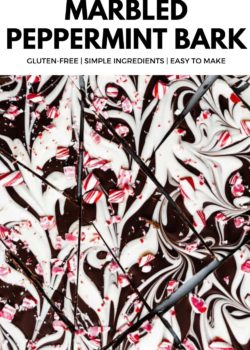
This Marbled Peppermint Bark will quickly become your favourite holiday treat. All you need is three ingredients and 15 minutes of your time to make this fun crowd-pleasing holiday dessert!
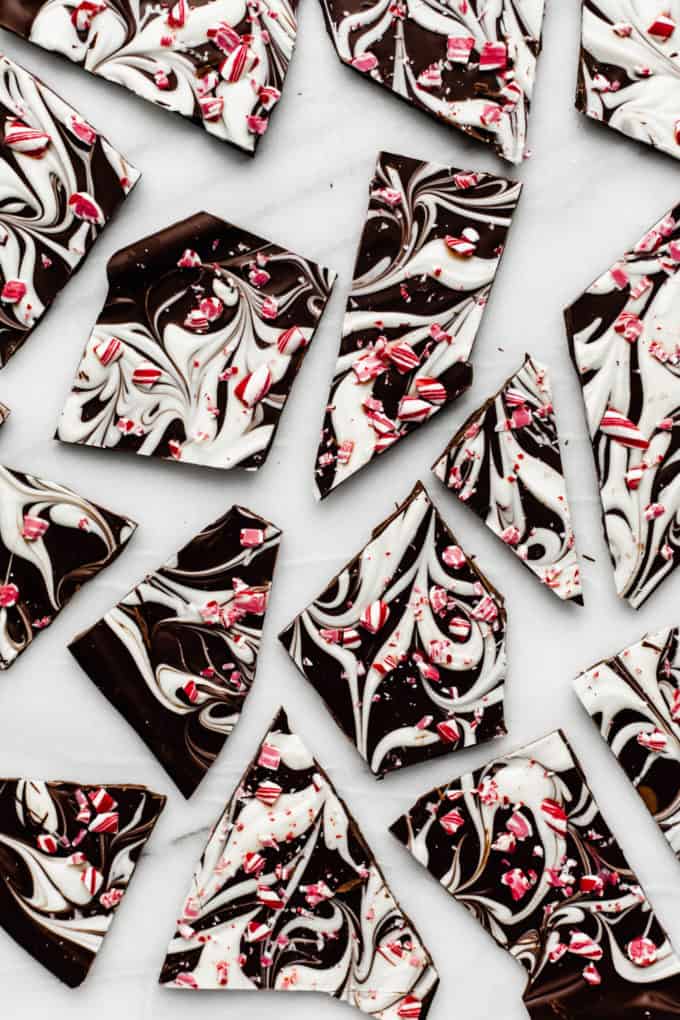
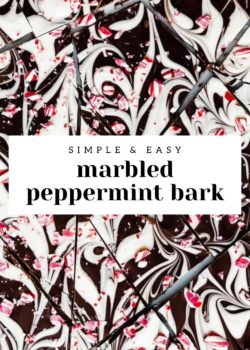
Peppermint Bark with white chocolate
It’s that time of the year when the air is filled with the scent of peppermint and chocolate, signalling the arrival of festive treats! And what could be more festive than a batch of Homemade Chocolate Peppermint Bark?
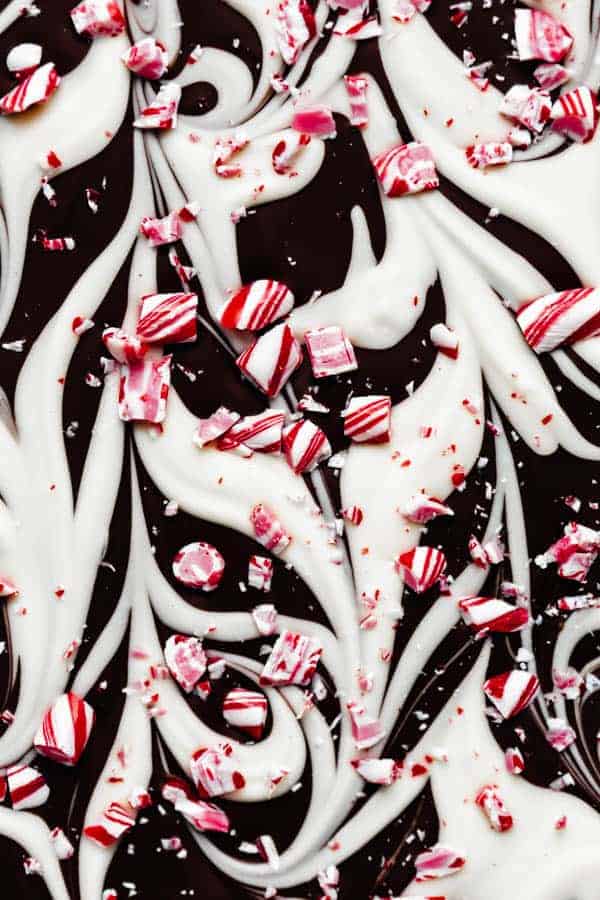
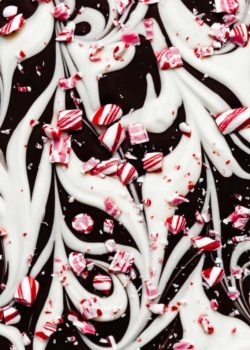
This Marbled Peppermint Bark is made with a combination of rich dark chocolate swirled with white chocolate and topped off with crushed candy canes. It’s made with three simple ingredients and is one of the easiest recipes to make for the holidays. I love making a batch of this peppermint bark to wrap up and give out as little gifts around the holidays.
Why you’ll love this Christmas bark
- Easy to make. Some holiday desserts can be long and complicated to make. This recipe for Marbled Peppermint Bark is super easy to make and perfect for a last-minute dessert.
- Fun for kids. Want to make a fun dessert with your kids? Try making this peppermint bark! It’s fun for the whole family.
- Great for gifting. If you love to give out homemade treats for gifts around the holidays, try wrapping up some of this bark to give to your loved ones. Trust me, they’ll love it!
What is peppermint bark made of?
This recipe is made with a combination of three ingredients:
- Dark chocolate
- White chocolate
- Peppermint, usually in the form of crushed candy canes.
You’ll see a variety of recipes for peppermint bark that use different types of chocolate. Any chocolate you love will work in this recipe (i.e. milk chocolate, dark chocolate…etc.) so you can adjust the recipe according to your personal preference.
Peppermint bark ingredients
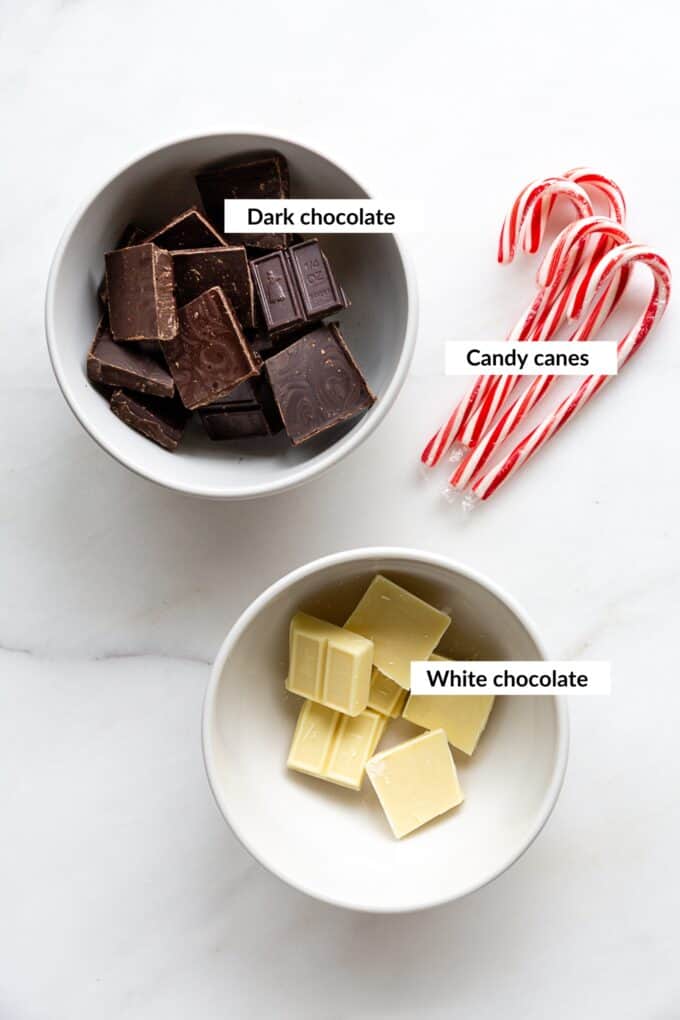
- Dark Chocolate: Dark chocolate provides a rich, intense cocoa flavour that forms a deliciously deep base for the peppermint bark.
- White Chocolate: White chocolate offers a creamy, sweet contrast to dark chocolate, adding a smooth texture and a touch of vanilla essence.
- Peppermint Candy Canes: Crushed peppermint candy canes sprinkle a festive, minty crunch over the bark, perfectly balancing the sweetness of the chocolates.
*Full ingredients and instructions are below in the recipe card
How to make peppermint bark
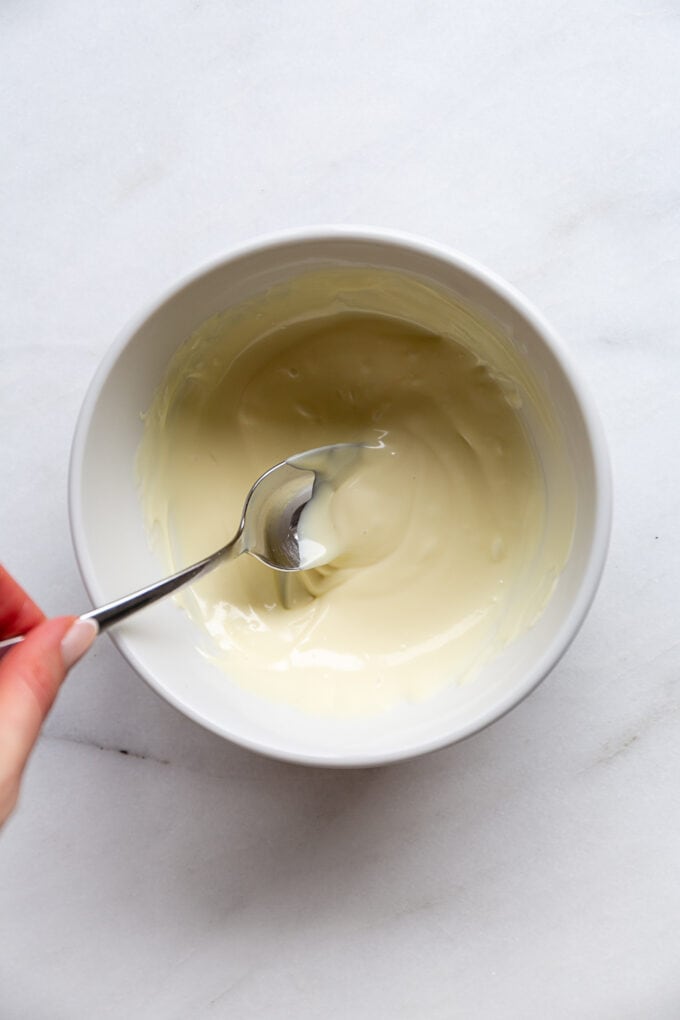
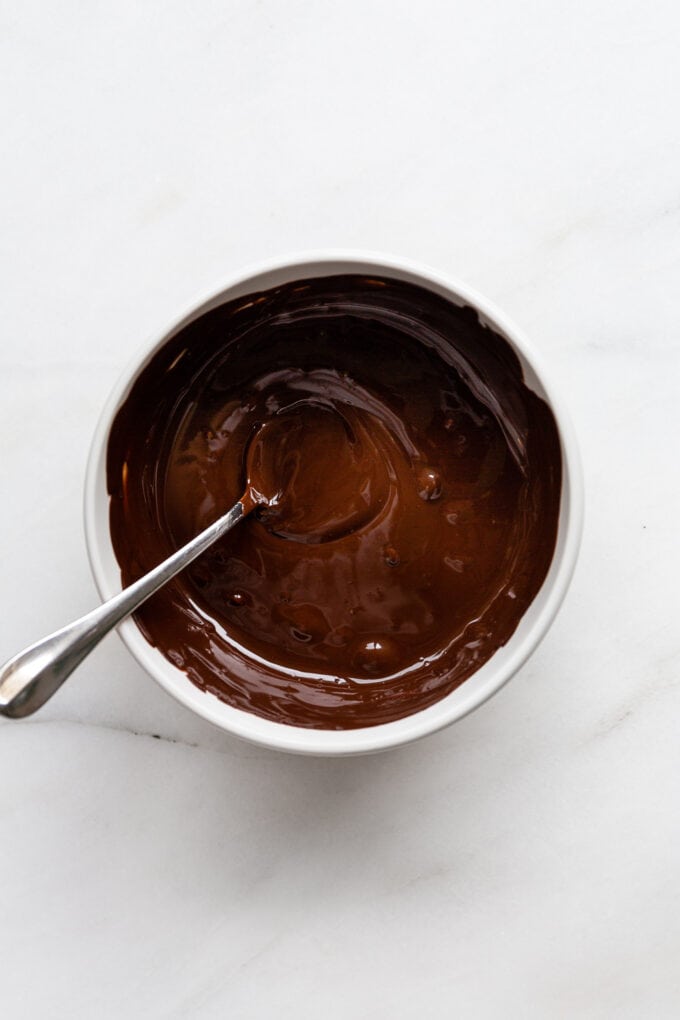
Step 1
Melt the white chocolate and dark chocolate in two separate bowls using a double-boiler method or in the microwave.
Step 2
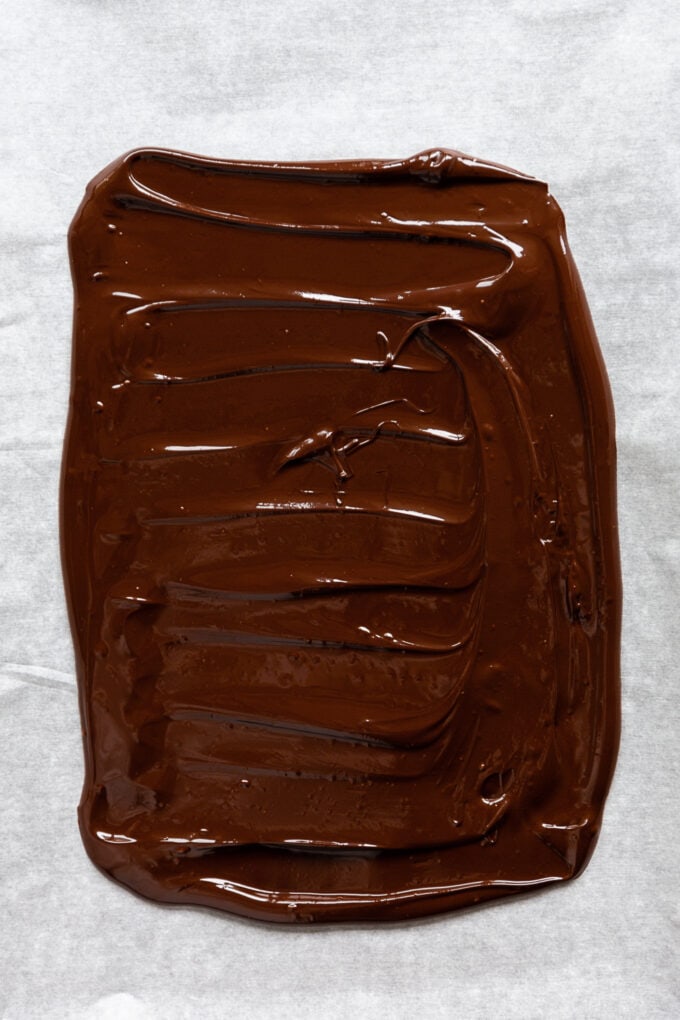
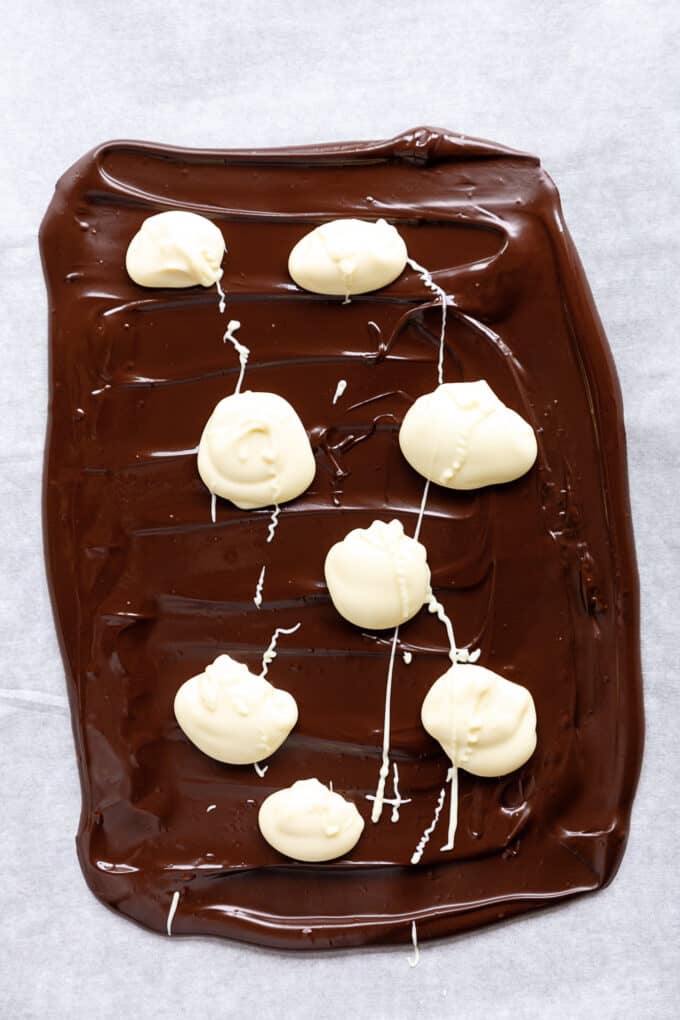
Line a baking sheet with parchment paper or a silicon mat, then spread the dark chocolate evenly onto the parchment paper, about 1/4 inch thick. Then add dollops of the white chocolate on top.
Step 3
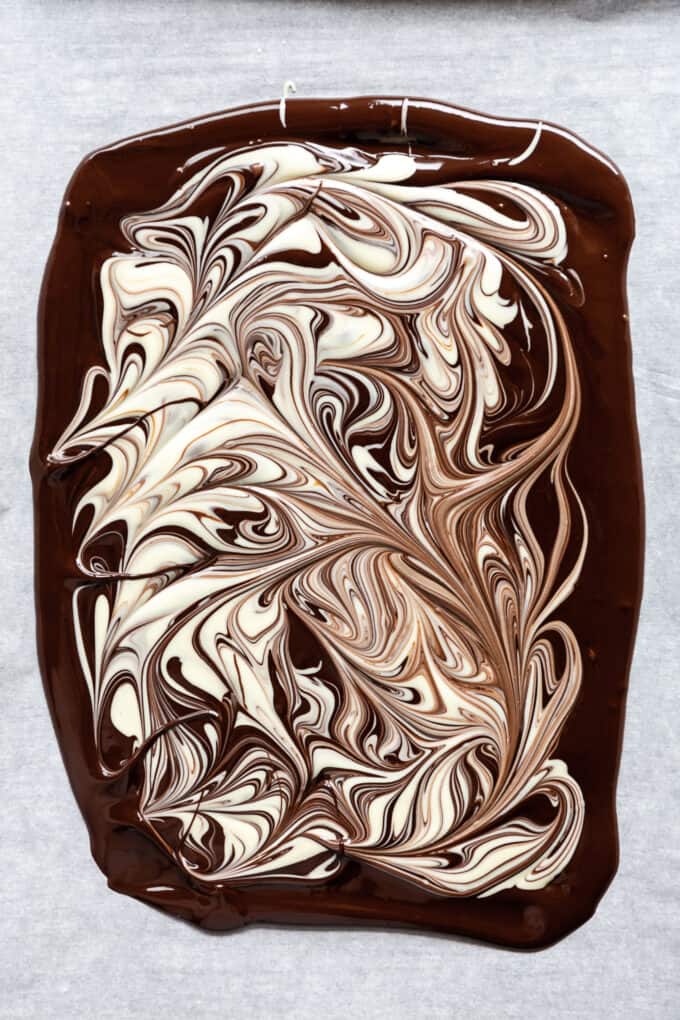
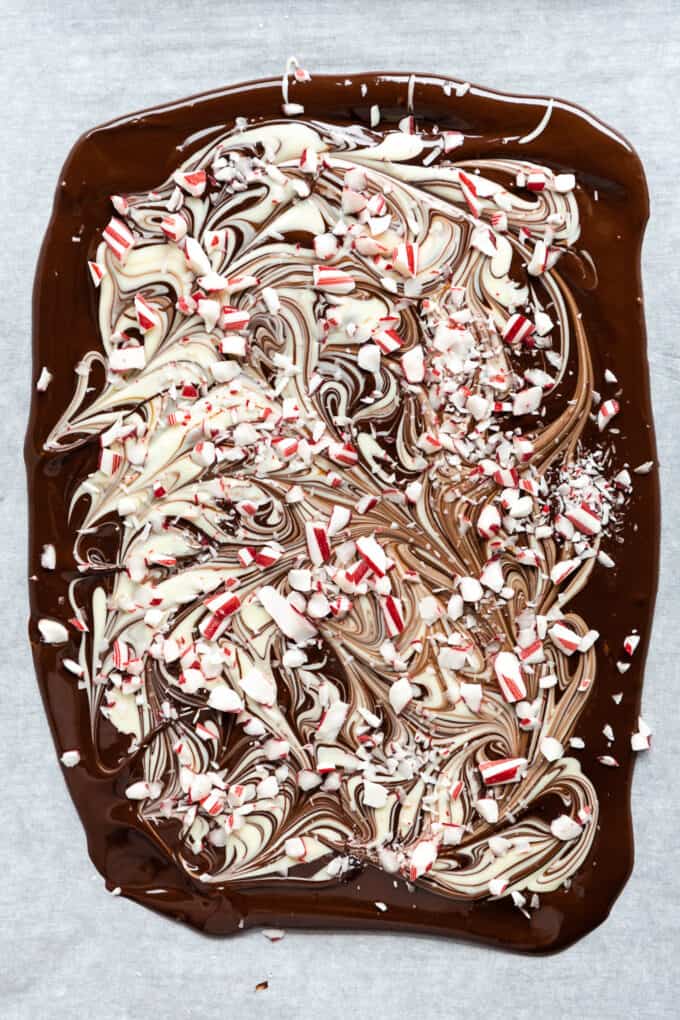
Use a knife, chopstick or skewer to swirl the white chocolate into the dark chocolate then sprinkle with crushed candy canes.
Step 4
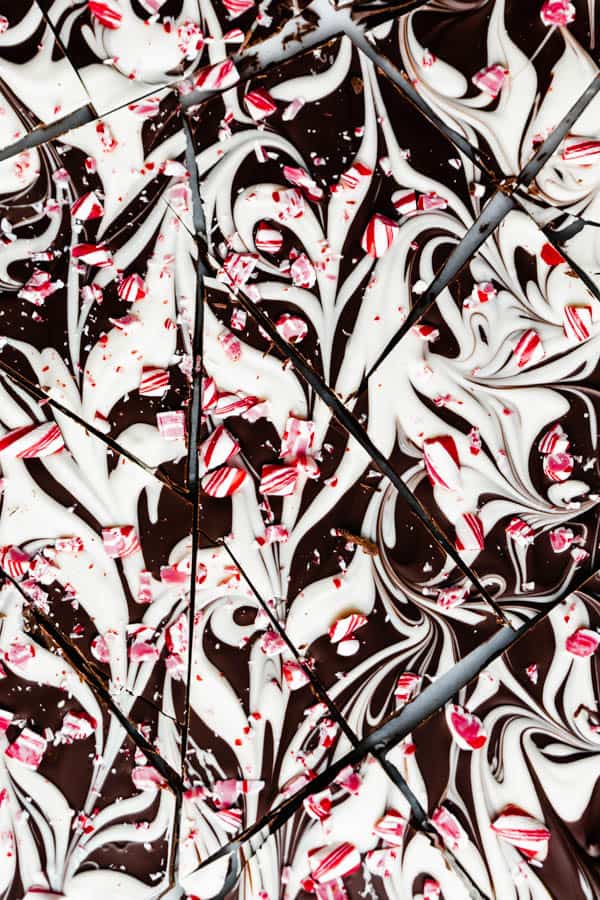
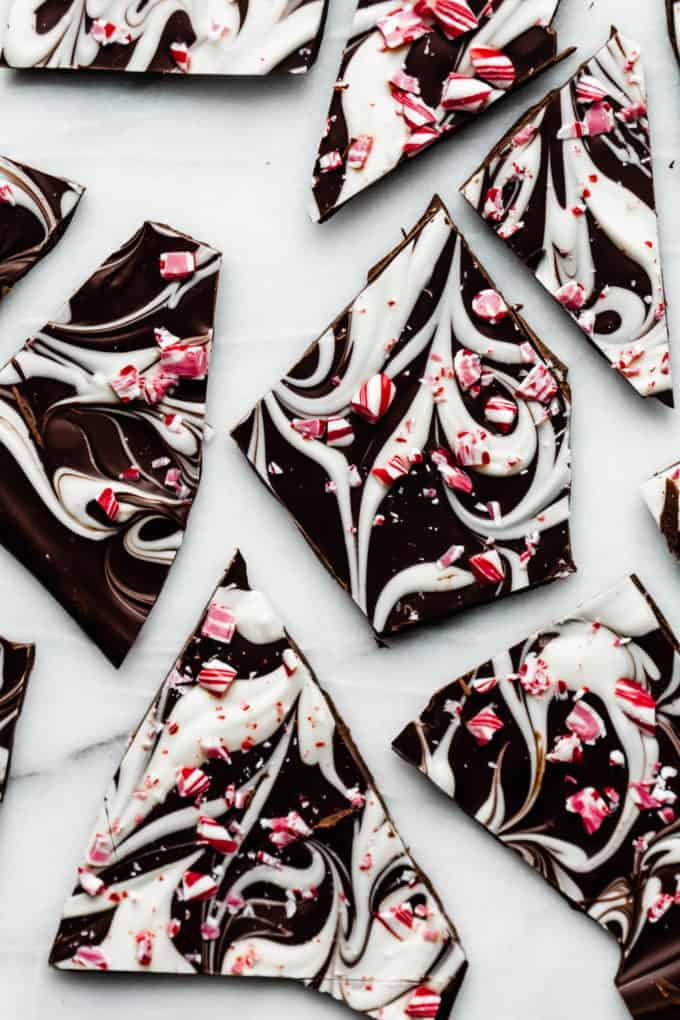
Place in the fridge to set for at least 1 hour. Then remove from the fridge and break into pieces with your hands or a knife.
How to store
This chocolate bark can be stored on the counter, fridge or in the freezer.
Counter: Once your bark has completely set and been broken into pieces, transfer it to an airtight container. If you’re stacking layers of bark, place a sheet of parchment or wax paper between each layer to prevent them from sticking together. The bark can be stored at room temperature in a cool, dry place for up to two weeks.
Fridge: If your home tends to be warm or you prefer a firmer texture, you can also store it in the refrigerator in a sealed container. Let the chocolate thaw for 3-5 minutes before eating.
Freezer: If you want to preserve the peppermint bark to last a long time, you can tightly wrap it in plastic wrap and place it in a freezer-safe bag in the freezer for up to 3 months. to defrost let the chocolate thaw on the countertop for 5-10 minutes before eating.
Tips for making this recipe perfectly
- Use high-quality chocolate. First things first. a good chocolate bark always starts off with high-quality chocolate. I use 70% dark chocolate and white chocolate in this recipe.
- Temper the chocolate. Tempering chocolate is the process of heating and cooling the chocolate to put it into
temper . This gives the chocolate that nice shiny glossy look, and that ‘snap’ when you bite into it. - Cool Completely: Allow the bark to cool completely before breaking it into pieces. This ensures a clean break and maintains the layers.
- Add Toppings Quickly: Sprinkle crushed peppermint candies or any other toppings on the chocolate while it’s still melted so they stick well.
Peppermint Bark FAQ
Homemade peppermint bark will go bad eventually because the crushed candy cane can become stale. The chocolate can also start to u0022bloomu0022 (get cloudy and grainy) sitting on the counter after a week or two if not eaten. To prevent this, it’s best to temper your chocolate.
Peppermint bark tastes like mint chocolate! If you love the combination of chocolate and mint together then you’ll love peppermint bark. This particular bark has a richness from the dark chocolate, creaminess from the white chocolate and crunch from the candy cane.
Peppermint bark does not need to be refrigerated and will stay well in an airtight container on the countertop for up to two weeks. You can also store the peppermint bark in the fridge if you prefer.
It’s important to use good quality chocolate to make peppermint bark for the best taste. I recommend 70% dark chocolate or semi-sweet chocolate. This will give a great flavour in contrast to the white chocolate and the sweetness of the candy cane.
Good old-fashioned peppermint-flavoured candy canes! You can use the ones that are just red and white, or if you prefer you can use the ones that are red, green and white.
Absolutely! Feel free to experiment with dark, milk, or white chocolate, or a combination of them.
Try these peppermint recipes next!
If you tried this Marbled Peppermint Bark or any other recipe on the blog let me know how you liked it by leaving a comment/rating below! Be sure to follow along on Pinterest, Instagram, Tiktok and Facebook for even more deliciousness!
Marbled Peppermint Bark
- Prep Time: 15 minutes
- Cook Time: 0 minutes
- Total Time: 15 minutes
- Yield: 20 servings
- Category: Dessert
- Method: Melt
- Cuisine: American
- Diet: Gluten Free
Description
Peppermint bark made with 3 ingredients is the perfect holiday treat!
Ingredients
- 12 oz 70% dark chocolate
- 6 oz white chocolate
- 2 large candy canes, crushed
Instructions
- Melt the dark chocolate and white chocolate separately in two bowls using a double boiler, or in the microwave in 30-second intervals. (If using a microwave, only melt the chocolate until it’s about 85% melted. Then remove and stir with a spatula until fully melted.)
- Cover a large baking pan with parchment paper or a silicon mat.
- Pour the dark chocolate onto the pan, then use a spatula to spread the chocolate into a large rectangle, until it is about 1/4 inch thick.
- Next, use a spoon and add dollops of the white chocolate evenly on top the dark chocolate.
- Use a toothpick to make swirl motions in the chocolate to get a marble effect.
- Sprinkle with crushed candy canes then transfer to the fridge until fully cooled.
- Use a knife to cut into pieces.
Notes
Use high-quality chocolate for the best results.
Store on the countertop or fridge in a sealed container.
Nutrition
- Serving Size: 1 piece
- Calories: 143
- Sugar: 15g
- Fat: 8g
- Saturated Fat: 5g
- Carbohydrates: 17g
- Fiber: 1g
- Protein: 2g


I make this all the time plus your superfood chocolate bark..?